Pages

Showing posts with label tutorial. Show all posts

Thursday, December 15, 2011

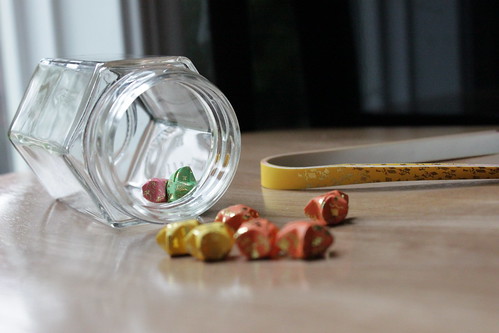
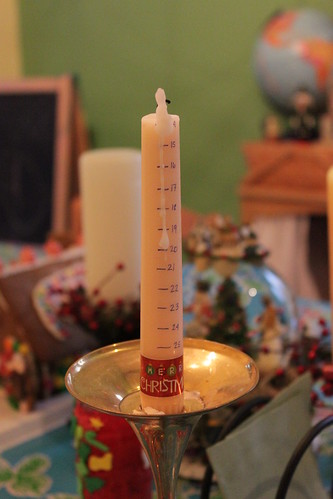
How to Make an Advent or Count Down Candle

Advent candle

Materials Needed:
1 taper candle
permanent, fine-tip, marker
a festive sticker

This was such an easy thing to put together, but the kids have really enjoyed it, so I thought I'd throw the idea out for anyone who'd like to have their own.

Lay your candle out next to a ruler, and measure from the top tip to about an inch and a half from the bottom.  Divide this number by 25, and mark off each section with a permanent, fine-tip, marker (I used a colored Sharpie.)  Label each mark with a number, and put a festive sticker at the bottom to mark the big day.

This has been such a big hit, we might do these for other events- counting down to birthdays, the arrival of relatives, last day of school..... if you can't find a sticker you like, you could use a pressed flower or picture on a thin piece of tissue paper, and use melted bees wax or paraffin, painted under and over, to secure.  

Tuesday, October 25, 2011

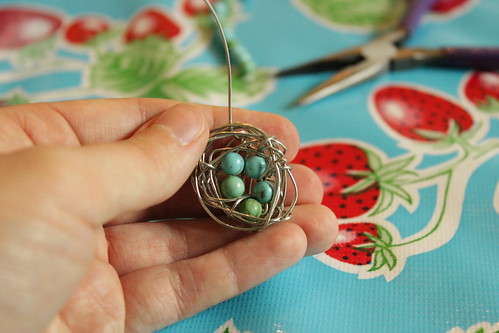
Bird Nest Pendant Tutorial


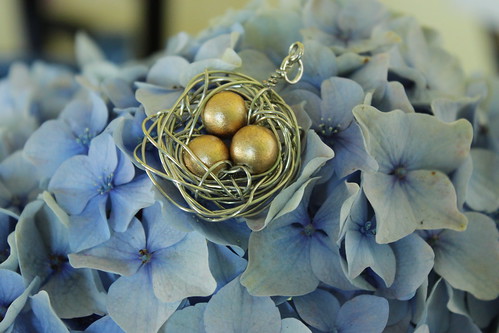
Three gold eggs in a nest

I love making these, and they have a different meaning for everyone.  Two pearls in a little nest make a sweet wedding gift.  One great big pearl in a nest reminds a young woman of her inherent worth.  A handful of little stone beads are a mother's children...or just her favorite colors!  I love that every person who makes these wraps them a little different- every nest is totally unique.

bird nest pendant

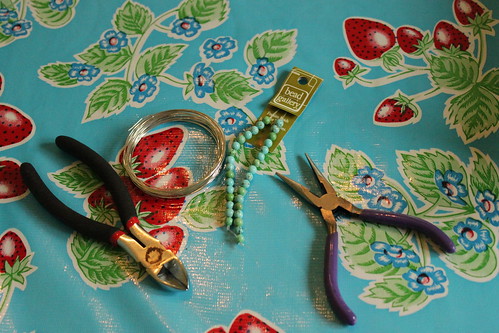
Start with your supplies: wire cutters, 20 guage copper wire, beads, and needlenose pliers.  If you have round-tip pliers, those will come in handy too.  (If you make jewelry, you'll know what these are.  If you don't, don't sweat it:  you can totally make these with things from the toolbox.)

bird nest pendant

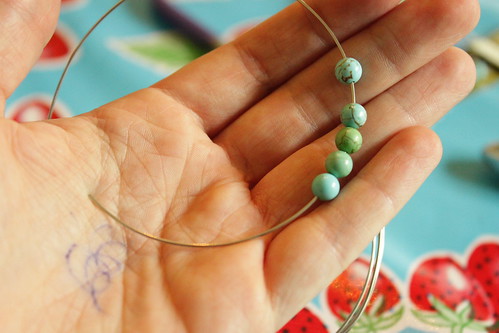
If you want a petite nest, cut three feet of wire.  (I get my wire at Michael's, in the jewelry section.)  If you want a chunkier nest, cut 6 feet.  (This nest today is about 3 feet, with 6 mm beads.)  Those are my two favorite lengths- try it out, and see what you like.  I will tell you that learning this project with three feet of wire will be easier than having six feet of wire whipping around.  Thread your beads onto one end of the wire, and leave a 2 inch tail behind them.

bird nest pendant

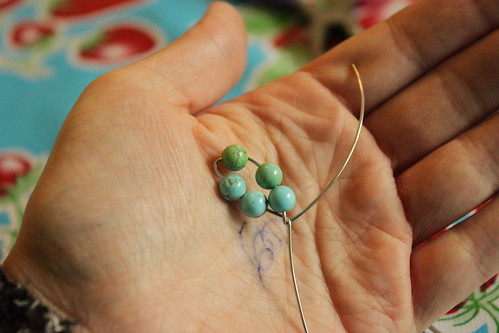
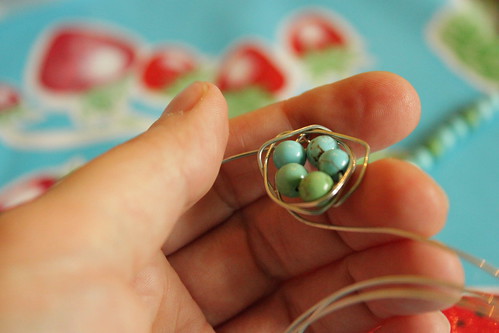
Now, to make the center of the nest, twist the beaded section into a loop and twirl the ends together to hold it steady.  Hold the beaded loop in one hand, and the wire in the other, and just turn one side like a key.

bird nest pendant

Now take the long tail, and start wrapping it around the outside of the beads to make a wreathe.  Go around about three times.

bird nest pendant

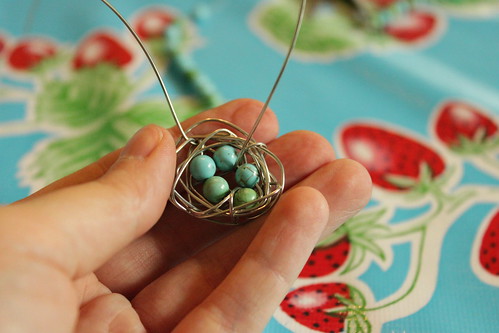
Now take the end of the long piece, and come up from the bottom to "sew" all those wire loops together.  Sew it twice, to anchor.

bird nest pendant

Now, it's up to you! Go around the outside some more, make it as tight or as loose as you like.  If it starts to feel like it's going to spring apart, anchor it again by sewing from the bottom.

bird nest pendant

If you want "nest" underneath the beads, be sure to wrap the wire underneath and across a few times.  I literally just wrap it by crossing underneath, then crossing on the top side at the edge, and anchoring it when it starts to feel loose.

bird nest pendant

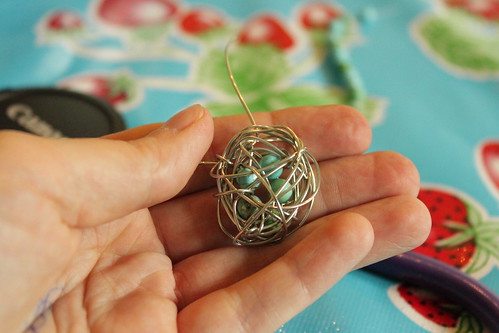
When you get to the end of your wire, start "sewing" all the way around the edge of the nest to make sure things are sturdy.  When you can't wrap any more, curve the end of your wire with the needlenose (or round tip) pliers, and just tuck it into the back side of the nest so it won't poke anyone.

bird nest pendant

That 2 inch tail you left at the beginning is still sticking out the top, so let's finish that.

bird nest pendant

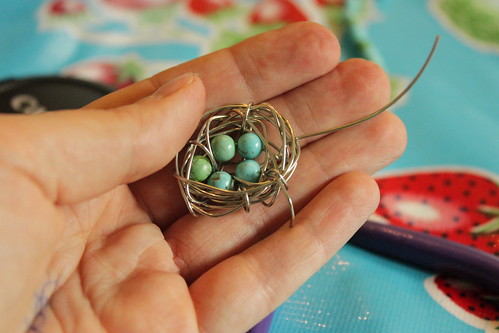
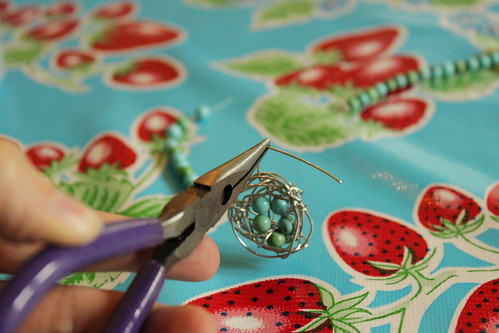
With your needlenose pliers, bend a 90 degree bend in the wire about half a pinky-width up from the nest.  Now you're going to use your pliers as a guide to make a small double loop, starting at that bend.  Bring the tail down to the bottom of the second loop, and wrap it around the wire between the loop and the nest.  Crimp it tight with the pliers (or a crimping tool) to make sure it won't poke anyone.

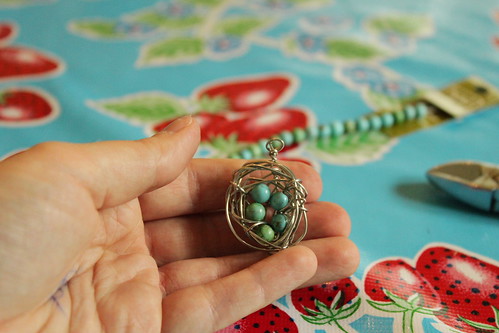
bird nest pendant

You've made a nest pendant!

(These are also available in the shop.)

Monday, May 23, 2011

Get a Head Full of (No-Heat) Curls

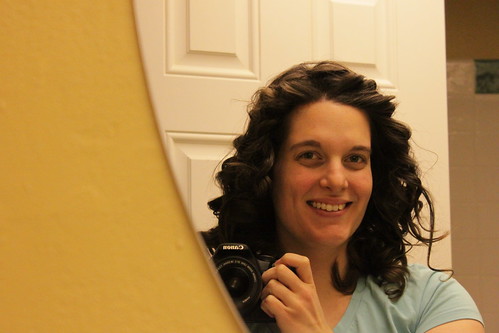
no-heat curls

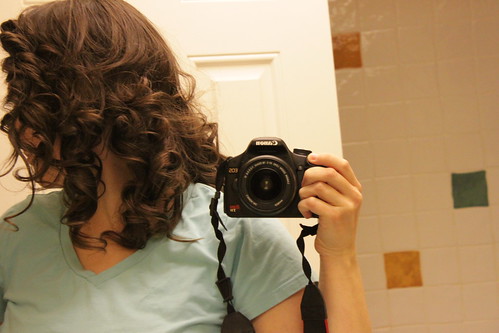
My hair has never held a curl before.  N.E.V.E.R.  Plus, I don't even know how to properly use a blow-dryer.  (Can you see how sad my teen years must have been?)

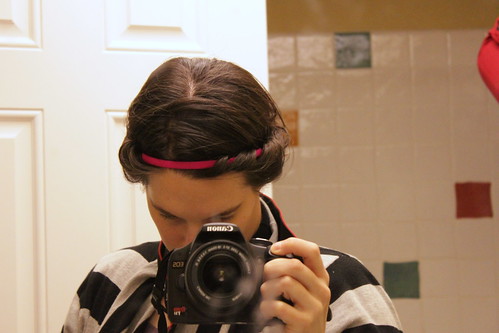
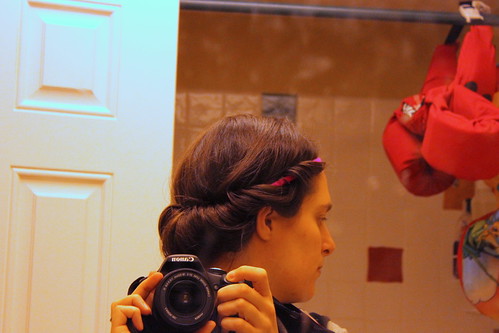
Grosgrain featured this tutorial, and you MUST try it out!  It's super easy, comfortable, and looks adorable (I think!)

no-heat curls

no-heat curls

no-heat curls

I washed my hair in the morning and let it mostly dry (dry, but still just wet enough to have some body), then ran a blob of mousse through (especially the ends) and tucked and tucked and tucked it around my headband.  I used a bit of hair spray to make sure it didn't unravel, and left it in till the next morning.

Also, if you happen to be around the princess-loving set while your hair is up...they will LOVE it.  Ernie is considering growing out her hair, just to have it up "fancy" like mine.  Knowing how much she loathes brushing her hair, that's quite a compliment!  You know, if you're into compliments from five-year-olds.  (Which I am.)

Thursday, November 18, 2010

Handmade Christmas Gift Ideas

Christmas is shrouded in secrecy...but crafting goodness has to be shared!  It's a conundrum, so here: loads of tutorials I've seen around the blogosphere, and these have made it onto my "Hmm....I could make that for somebody!" radar.  Maybe I've made some of these...maybe I haven't....HA!  Family, you are foiled again!!

Enjoy!  These are my favorite ideas from 2009 and 2010....

Felt Tree Skirts
Elastic Bookmarks (Simple elastic + charm)
Simple felt capes for kiddos
Tiny doll quilt for baby dolls
How to cast off if you want to make something square on a round loom.
Easy pacifier clips to use your lovely woven ribbons
If you still have pumpkins laying around, pumpkin butter for the freezer
Darling fabric flowers that look like kanzashi, but are simpler
Ephemeral, but darling paper flower crown for little girls
The perennial favorite at church craft days, a scrap wood plaque with a scripture and family name
How to make a hammock
Dream of warmer days, and make a tea cup bird feeder
A printable painting of a cupcake, by the fabulous artist Bobbi.  (Wouldn't this be great printed on transfer paper and put on an apron??)
Wallet from a dishtowel
Sugar scrub- nummay!
Thumbprint pendants- we made these for Mother's Day, but they were darling, and a HUGE hit!
Stamped metal pendants- so popular right now!!
Terrariums for the nearby nature lovers with black thumbs
Baby tights!  Rae is absolutely genius!
Photo bean bags
Twin sheet teepee tent
DIY Jump Rope
Hot sauce at home?  Awesome sauce, is what this sounds like!
Kiddo crafts from the boys at Blue Yonder- I especially love the stenciled flour sack towels
Soap balls that look like snowballs, made by kids.  Yes please!  (Ooh, and there's even a toy surprise inside!)
Keychain coin purses- they made these from dishtowels, but you could use anything
Photo blocks and tiles- will we ever run out of way to give pictures of the kids to family members??
Amy's take on the crowd favorite, "Reindeer Food" to tempt those critters into your yard Christmas Eve
Super simple (and punny!!) neighbor gifts
Peppermint Bark Popcorn.  YUM.
Messenger bag tutorial- yay!!
Resin-filled rings- tres chic!
Super simple and inexpensive memory game from security envelope patterns.  Maya makes it look cool!
Embellish a plain umbrella with ruffles- we might make it through this PNW winter after all
Fabric ballet flats- simply darling, and would make great "house slippers" for a little girl
A little child-sized apron from tea towels
Reusable picture frame calendar with vinyl-  I had one, I loved it, and it jumped off the wall in the middle of the night and busted into a hundred pieces.
Tutorial for an oval oven mitt- so cute!
Car CD holder- yes!
An artsy way to make a fabric collage notebook cover
English toffee- yummy!
A super creative fishing game for little tykes, cleverly made from old paint brush handles
You can transfer inkjet images to wood blocks- so adorable to make toys!
Crinkly taggie square for babies- always a hit
Homemade chili powder
Story dice for the little tykes

You can see everything I've posted tutorials for, over on the side bar, but I'll make a post with my favorites soon :)  Time to get busy, busy, busy!!
Monday, September 20, 2010

I Made This: Modpodged Shoes

I saw a few mentions in the past year of people Modpodging their shoes. Hmm....they all used fabric, but I thought I'd give it a go with tissue paper!
These are Ernie's church shoes. They looked a little worse for wear in the toes, and the ribbons were frayed, but they still had a bit of room so I wanted to revamp them just enough to buy us some time before she outgrew them.


I started by snipping away all the ribbons and froo-fra, then starting at one spot and painting a good thick coat of Modpodge, and sticking on chunky pieces of tissue paper, letting them be a bit rumpled and wrinkly, especially in the spots that needed more coverage. (This is a great reason to save tissue paper from gift bags, even if it's torn and wrinkled, if it has a FABULOUS print.)

She hasn't worn them yet (typical- I spend all this time re-doing her FAVORITE church shoes, and she decides to wear her glittery red shoes...the ones that are next on my list to be re-vamped because they're worn in the toes too!) but they are still flexible and look like they'll stand up to another few months of church.

*Story: My niece is very hard to impress. I made these shoes at her house after she went to sleep, and when she came down in the morning she stopped, turned to her mother, and said "I. Want. Shoes. Like. THAT." I promised her she could have these when Ernie outgrew them, if her mother couldn't find anything else we could gussy up for her!*


I've linked this up to the weekly Mad in Crafts linky festival- go check out the other fabulous projects!
Posted by Picasa

Wednesday, June 16, 2010

Another Belly Band Tutorial

I have this massive, old t-shirt that's been floating around my drawers for years. It was a "door gift" at a work meeting held in the CONVENTION CENTER to announce that yes: Cingular was Purchasing our Company. 

And as your prize, here's a t-shirt smashed into the shape of a 5" football and shrink wrapped.
(We thought it was weird too.)

The t-shirt came in handy when I left work shortly thereafter for (permanent) maternity leave. By virtue of being the largest item of clothing in our house, it became the only thing I could wear to bed.

(In my first pregnancy, I was carrying a swimming pool for Ernie: double amniotic fluid. My legs would keep finger-induced indents for a full five minutes. I went from a curvy 140 pounds to a human-water balloon 210 by the time I waddled into that hospital for the last time. Sufficeth to stay, once I got out of my chair and developed a forward momentum...people generally got out of my way, and NEVER EVER got between me and my next milkshake. ahem.)


ANYWAYS! I was dead tired of looking at this shirt, which has oddly stayed in the bottom of my pajama drawer through two moves now.

Slice off the bottom.

Cut the width down to size (I used my under-bust measurement, divided by two since this is a tube. But I'm sure you could have figured that out. It worked out to 16". Looking back, the t-shirt isn't that stretchy- it's tight on my hips, but hey: it stays put REAL GOOD.

Serge up the open edge.

VOILA! My size XXL t-shirt, parting gift from a wacky corporate "team building"/"we're going to eat your company for breakfast" meeting...can now be worn around my hips, to block unsightly views when I bend/clean/pick up children/live. Crazy good!
Posted by Picasa

Monday, June 7, 2010

How to Patch a Couch

This is a quick and dirty method to patch up your comfy, well-loved, pieces of furniture.

This couch was in my parent's living room when I was growing up. It's seen active duty for 15 years now, and will hopefully see many more!

However, little tushies had worn completely through the cushion fabric, and if there's a hole you KNOW kids are going to stick their fingers in to see if it's possible to make the hole bigger. (It is.)

First, cut a piece of fabric larger than your hole, and iron in the edges to the wrong side of the fabric. To make the corners lie flat, open them out, then push them in on themselves so the edges cover the corner, and keep ironing. (See picture.) A seam ripper is helpful to hold the corner in place while you iron it down.


Lay your patch right side up and stitch it to the seat cover, trying not to sew it to the cushion itself. You want this to be able to move when the cushion cover shifts around, or it will stress the stitches.

I just did a basic running stitch, you could get fancy and do something else. I'm not fancy.


Finito!

If you want to get inspired about patching up your beloved furniture, there's a really neat picture of a much-patched arm chair in Amanda Soule's book Handmade Home

Posted by Picasa

Wednesday, June 2, 2010

Paper Graduation Mortarboard Hat Tutorial

I made paper mortarboards for Ernie's Joy School class to wear at their graduation ("gradulation" as E says). The instructions I found were great, but I thought some pictures would make them better!

From a large piece of posterboard,laying "landscape" cut:
6 8"x8" squares
6 3"x24" strips (note-if I did this again, I'd cut these strips 4-6 inches thick)

Measure your child's head, and mark off a strip to that length.

Lay each strip down and mark off 1 1/2" long-ways with a straight edge and a ball point pen, pressing hard. (Or, if you having a boning tool, just use that.) Fold on the mark.

Cut one side of the paper like a saw. You don't want space in between the teeth, or this won't bend into a nice circle for you.

Bend into a circle with the "teeth" pointing in- tape together the ends so that the end of one side matchs with the head measurement marking on the other.


Put your hat circle on a piece of newsprint, drizzle with glue, and press well onto a square of paper.

Poke a hole in the middle with a nail, and use a brad to attach a tassel.

You can make your own tassel by wrapping yarn around a 6" piece of cardboard (I used my 4" quilting ruler, it worked fine.) Cut the yarn off the skein with a 9" tail, wrap the tail a few times around the top of the loops and tie to secure. Cut the bottom of the loops to make a nice fluffy tassel.
Posted by Picasa

Monday, May 3, 2010

You Can Make This: Paper Star Tutorial

paper stars
I found an old stash of "star paper" a friend gave me....oh, a long time ago.  Ummmm....like, we were in, like 7th grade, you know?

Wow.

Anywho, on the off chance that someone out there didn't go through middle school making a bajillion of these out of the tear-off edges of the printer paper from the staff lounge, here's a tutorial!

You'll need a strip of paper- it needs to be perfectly straight on the sides.  Length isn't too critical- 8 to 12 inches is fine, but should be about a centimeter across.  The thicker it is, the longer your piece of paper will need to be.  (I wonder what this would look like made out of butcher paper?  Would it be stiff enough?  Moving on....)

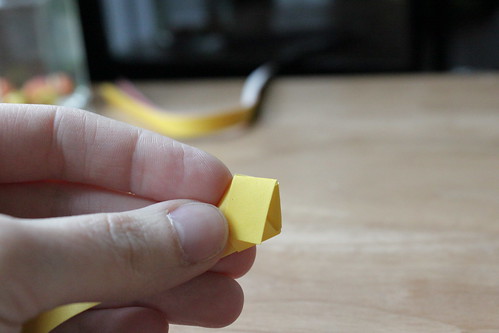
On one end of the piece of paper, tie an overhand knot and careful scootch the knot together so that the paper just fits in the holes.
Like so.
paper stars

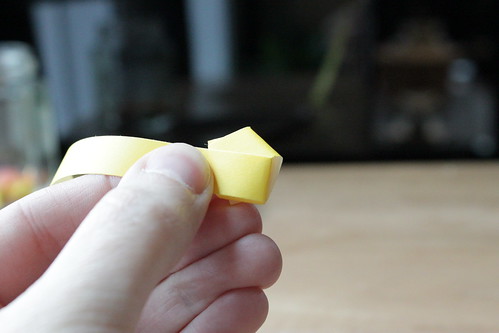
To take care of the short tail, either cut it, tear it, or fold it back.  I like to fold it back.
So.
paper stars

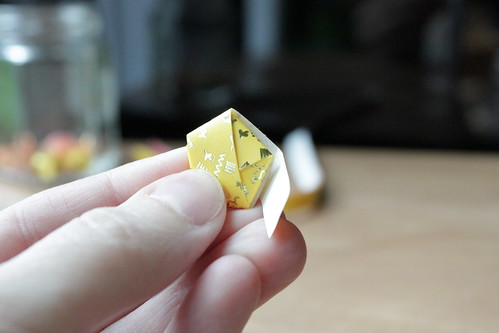
Now take the long tail and start wrapping it firmly around the pentagon you've made, from one side to another, straight across.  Make sure the paper covers the edge it comes from, so your shape stays true.
So.
paper stars

Keep wrapping and wrapping until you run out of paper.
paper stars

Tuck the end of your strip underneath the last complete pass of the paper.  If part stick out the other side, tear or cut it off.
paper stars

Now grab one corner and pinch to a point.
paper stars

Hold onto the point you just made with one hand, and with the other pinch the opposite side into a point.  Continue around, holding on with both hands to keep it symmetrical.

Yay!
paper stars

Friday, April 9, 2010

Simple Jumper


I traced a simple cotton jumper onto wrapping paper to make a pattern, and busted this dress out during naptime today. While on the phone. (Yes, with Aunt LoLo. I realized today that she is the ONLY PERSON ON THIS EARTH that I call just to chat with. Is that normal? Moving on...)

I chose a sturdy cotton fabric- it might be duck, I inherited it from a friend's stash. It might be a leetle too stiff, but it will loosen up after a washing or two. All seams and edges are serged, and I used the sewing machine to turn the armholes and neck in (sewed with a contrasting thread, chocolate brown.) I put a little split-stitch lavendar heart on the front, because it's a pet peeve of mine not to know which way is the front (yes, even if it doesn't matter :)

Interestingly enough, the arm and neck fit my almost-five-year-old PERFECTLY. The cut is atrocious, though. At least with this fabric, on her frame.

I didn't take a picture of the original jumper, but here's the top:

...and here's the bottom. I love the fringe. (Yes. That is my toddler, sitting on a kitchen cart, eating a spoonful of peanut butter. It's her favorite snack in the entire world- she brings me the PB jar and a spoon when she's hungry. However, Grandma SuSu introduced her to nutella tonight. I think her love affair with plain old PB might be over, she's moving onto bigger and better things.)
Posted by Picasa

Thursday, April 8, 2010

Sillhouette Tutorials


Ernie, age 4

Myrnie, age 6

Our Joy School girls have been working on their "All About Me" books for the last few weeks- they're SUPER cute! Every lesson, they did a new page- a collage of their favorite foods, a self-portrait, a drawing of their family, their hand and foot prints, and yes: their sillhouettes. Today they got to take them home- OH where they excited! As soon as their mothers walked in the door, the girls were running, yelling "MOM! Let me show you my BOOK!"

There are lots of different ways to do these, but here are a few tutorials in case you want to give it a try!

Aunt LoLo went hi-tech/low-tech with a computer-as-light-box, and a piece of scotch tape. Ingenius.

A quick google search yielded this tutorial, which is how my friend/fellow Joy School Mama made Ernie's sillhouette (and all the rest of the girls.) She took the girls' pictures against a white wall, and said the whole process was lickety split! The copies were done at Kinkos, as COLOR copies- black and white printouts turned out rather grey.

Oh, and the second sillhouette up there is just for familial resemblence comparisions. It was done in Kindergarten, and I seem to remember sitting in front of a large gridded sheet of fabric, with a light shining. Some poor room mother probably had arthritis by the time she cut out the sillhouettes for the entire class! It hung in the spare bedroom at my grandparent's home for a long time, before it was sent home with me.

I'm looking for a childhood side-profile shot of my husband to turn into a sillhouette to add to the display. Because it looks rather odd with just Ernie and I. I need to make Mimi's too.

Posted by Picasa