Pages

Friday, February 27, 2009

Beautiful Life: French Bread for my Family

Welcome to our friends from Inspired Room! I'm glad to be part of Melissa's "Beautiful Life" link fest again.
***************************************************************************************
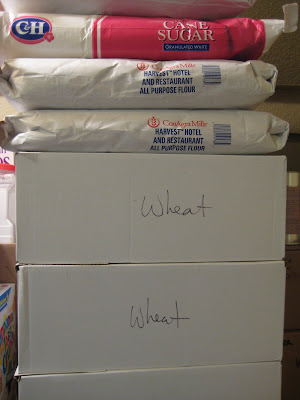
I started making bread in July of 2008, and have had a lot of fun doing so since then. My family mostly eats wheat bread (recipe will come soon), but for guests and family care packages it's always this french bread. Incidentally, Grandpa has declared this "better than Top Foods" (which is his grocery store of choice.) He actually has a standing bakery order- I keep trying to tempt him with other goodies, but he is adamant: French Bread or nothing. So, to keep him from purchasing bread at the store I supply him with a loaf or two every Wednesday. The girls and I are packing up tomorrow morning and heading out with my dad to visit some relatives in a neighboring state, so these loaves are for those families (along with some preserves from last summer. What good is bread without jam?)

This dough is really forgiving, but it does require a little babysitting. There's minimal mixing, but you mix and let rest for 10 minutes a total of SIX times. So that's over an hour of needing to be "at hand." However, this bread goes from cupboard to table in about 2 hours, so I'd say it could be a fair trade off for other doughs that take more time, but less hands-on. I like to get this started after the girls go to bed, while I'm getting caught up on e-mails and such. I can pull it out of the oven just before I head off to bed.

The recipe is originally from my sweet and very talented mother-in-law, who received it from a friend at church.

French Bread

Ingredients:
2 1/2 cups very hot tap water
2 Tablespoons white sugar
1 Tablespoon salt
2 Tablespoons oil

3 cups all-purpose flour

2 Tablespoons yeast
3-4 cups all-purpose flour

In bowl of stand mixer, whisk first 3 ingredients.


Add 3 cups flour and whisk again with whisk attachment until smooth.


Add yeast and final three cups of flour and mix with dough hook attachment- add up to a cup more flour if necessary, until dough clears the side of the bowl.


(three cups of flour, and yeast)


(needs more flour)


(This is just about there. I ended up using 7 cups of flour, total.)


Turn mixer off and let rest for 10 minutes.


(After resting 10 minutes)

Mix and let rest another 10 minutes. Repeat until you've mix/rested a total of six times.


(What it will look like at the end. I probably could have used a few more tablespoons of flour, but the wetter the dough, the better the bread turns out.)

Turn bread out onto a floured board or counter top and divide into 2 balls. Roll each into a rectangle about 8 inches across, then roll tightly like a jellyroll. Pinch the seams shut on the bottom and flip over. Pull the sides down to cover the ends and tuck underneath. Place loaves on a cookie sheet sprayed with Pam, or coated with corn meal.


(Hmm, I didn't do a very good job of tucking the end on that back loaf.)

Let rise 30 minutes while oven is preheating to 400. Then, slit the tops with a sharp knife and bake 25 minutes.


Bread is done when it sounds hollow if you tap it on bottom. Let cool on a rack, or rest on the corner edges of your pan.


Monday, February 23, 2009

Food Storage


The kitchen pantry

I've had food on my mind a LOT the last little bit.


The larger kitchen pantry

In the past week I've purchased:
25 pounds white sugar
75 pounds white flour
1 pound baking powder
36 cans vegetables
10 cans spaghetti sauce
25 pounds Krusteaz (umm...I grind my own wheat for goodness sake. Why do I purchase pancake mix??)
6 cans coconut milk
1/2 pound curry powder
16 pounds spaghetti
25 pounds jasmine rice


Bulk sugar and flour for immediate use, and long-term storage hard red winter wheat, canned

I received a challenge recently to write down 10 meals my family likes, and make sure I have the ingredients to make each meal THREE times. Then...BOOM. You have have a month's worth of food stored in your pantry! A few people scoff- "I only eat fresh food." Yes, that's very true. And it's very good for you, and probably the best thing you could do.


Last summer's canning, plus a few extras: rasberry jam, cantaloupe preserves, marmalade, mint jelly, strawberry jam, chokecherry syrup, apple butter, chow chow, apple sauce, and apple pie filling

But what do you plan to do if the grocery store has no fresh food, or you have no power and can't store it in the refrigerator? We know grocery stores only stock so much, and they depend on trucks coming through every day or so, and they depend on electricity flowing to their coolers.


Well, they WERE on sale...

We sat down to write our meals as a family tonight (well, Ernie just wanted chicken nuggets and rice for the rest of her life) and were surprised we could only come up with 5 meals I make on a regular basis. But you know what, we're OK with that.

Our meals:
pinto beans and rice (a nice, complete protein)
chili and rice (again, a complete protein. If we have company, I throw in half pound ground beef)
spaghetti with meatballs and homemade french bread
quesadillas
coconut curry (we've used prawns, but this could be combined with chicken, or even lentils) and rice


The best way to store things short-long-term: free buckets from the grocery bakery, plus a gamma seal lid.
This is the bulk wheat we use to make our bread, I fill a smaller kitchen container from here every two weeks.

So this week I'll be checking our pantry, making sure we have enough on hand to make each meal 6 times, along with enough to make our daily bread (wheat, naan, corn bread, biscuits, french bread) and breakfast foods like oats, cold cereal, and grits.


Oh dear- our stash of "prepared foods" plus quart-sized Ziplocs. I use SO MANY of those to freeze fresh produce during the summer.

Eventually, the goal is to have three months' worth of food stored in our cupboards, and a years' supply to long-term storage food. Did you know, properly stored, that wheat, rice, oatmeal, powdered milk, sugar, and beans can last over 30 years? At least well enough to sustain life?


We go through about 25 pounds of flour every month- I'm the family baker. We normally make two loaves per batch (about 3 batches a week), and one loaf goes out the door from each batch. I LOVE it! What good is baking if no one will eat it??
We go through 6 cups of wheat, and roughly 10 cups of white flour every week


What does your family eat? What do you store? Do you plan on storing more?

Friday, February 20, 2009

Beautiful Life: Generosity and Good Taste

Welcome to all the people here from Melissa's Beautiful Life linky fest!

I'm glad for the opportunity every Friday to slow down and think about what made life beautiful the past week. This week, it's definitely the kindness of a "stranger."

*************************************************************************************

Sometimes life is just funny.

My sister has a friend who lives in my (what used to be OUR) area. This sweet woman is so amazingly talented- she quilts, sews, knits, tats lace, and I don't know what else. She loves to share her talents, and loves to teach. (She taught my sister to knit.)

She also is quite a bit older than us (she has grandbabies, and we just have babies), which means: Major Stash.

A while back I posted about some fantastic vintage string I picked up at the thrift store- she sent this letter to my sister:

"I had to chuckle when I read your sister's blog about using a "vintage" thread she picked up at the thrift store to hang her little hearts. That big thing of thread came from my sewing room!


I suspect your sister lives somewhere near me and I'd like to offer her something. I'm going through things in my sewing areas and goodwilling them. I've got a box of wonderful non-quilting fabrics ready to take over there; but thought that I'd offer for her to come go through any stuff I'm giving away first; then if there's nothing that she thinks she can do anything with, off it will go. Let's just by-pass her going to the thrift store and paying for my stuff she can have for free!!"

Is there anything more wonderful than generous people?

I picked up four file boxes of fabric yesterday, and hauled them out of the trunk this afternoon. Gracious, she's de-stashing some GOOD stuff! Vintage ribbons, Christmas scraps, huge pieces of wool blends, sweet ginghams, vintage patterns, printed panels (remember those fabric books you used to make for your kids?), and I'm not even sure what else.

Here are a few pictures- I'll post more later as I work through her treasures!


I love these woven ribbons. Look at those little buggies, and bunnies!


This might be the perfect edging to the Easter skirts this year


Vintage patterns


Very vintage


Does anyone remember how to do their hair like that? It's so neat! And doesn't that dress in the back look COMFY?

Wonder Daddy? If I promise you a pair of these shorts, can I have a new shelf?


Ooh...I'm totally grooving on the tennis shorts OVER sweatpants look. I just wore them with leggings in high school. Okay, not really, but I AM excited to have a track pants pattern. Those things are EXPENSIVE!

So, Lynnae, if you're reading this: Thank you. Thank you very, very much.

Beaded Pin Tutorial

These were also part of the bridal order I recently finished, but I thought they're worth sharing since prom and wedding season are fast approaching. They add a nice polish, especially if you can match the men to the ladies' jewelry, or even coordinate the corsage pins with the rest of the jewelry.

Plus, they're just so fast that they're a blast to put together (especially if you're impatient, like me!) I found all my supplies at Joann's, but I'm sure other craft stores carry all these things. Look for corsage pins in the floral section- for some reason they're half the price of similar pins in the bridal section.

Beaded Boutonniere or Corsage Pin

Ingredients for this tutorial:
Corsage pins
Beads
Glue
Needlenose Pliers (to cut pins with)


Use the needlenose pliers to cut the ball of the end of the pin, and make sure you get all the glue off.


I used an old canning lid, but you can use anything you don't mind throwing away. Squeeze a bit of glue on there.


Take one of your pins, and dip the tip in and twirl a bit to pick up some glue.


Slide your bead up from the bottom all the way to the tip, and wipe the bit of glue off the end.


Slide your bead back up just a tad, so the end of the pin is slightly inside the bead.

Lay down to dry.


That's it! Enjoy.


Thursday, February 19, 2009

Shop Update: A Sale!

I'm running a sale in the Etsy Shop on beaded items- eyeglass necklaces and badge lanyards are marked down.

Spring is almost here, and I'm getting antsy. Time to clear out the old, and bring in the new!

Tuesday, February 17, 2009

Simple Drop Earring Tutorial

These earrings are so simple to make, but use some good techniques. (Honestly, my 3-year-old helped me get a bridal order of these earrings ready. Think I should pay her?)

Once you get the hang of these, look at a few of your favorite pieces of jewelry- chances are they're made with similar techniques. Just think of the possibilities!


These supplies are readily available at your local craft store, or even Wal-Mart!

You could probably go pretty far with just a plain set of needlenose pliers from the toolbox, to practice with but I recommend getting a jewelry set from the craft store. A plain vanilla set costs about $10. These pliers have springs in them to keep them OPEN when at rest, which is much easier than pliers that are naturally CLOSED.

I'm using sterling silver elements, with Swarovski Crystal in the peridot color. The rondelles are Swarovski as well, crystal color. Also, you can use whatever earrings you prefer- the bride wanted leverback, so that's what we did!


Simple Drop Earrings


Ingredients for this tutorial:
(2) leverback earrings
(2) 8 mm round (5000 style) crystals
(4) 6 mm bicone crystals
(2) 6 mm crystal rondelles
(2) silver 2" head pins


Start with one head pin, thread the beads in this order:
8 mm round
6 mm crystal rondelle
6 mm bicone
6 mm bicone


With your clippers, snip the head pin off about 3/8" above the last bead.


With your needlenose pliers, grasp head pin just above last bead, and bend at a 90 degree angle.


With your round-tip pliers, grasp the tip of the head pin, and curl tip up and into a curve, back to the 90 degree bend. You'll have to turn the pliers over at some point in that curve, unless your hand CAN turn around backwards.... regardless of how you do it (!!) leave the loop open just a smidge for the next step. (Oh, and please ignore how I'm holding the pliers- I was just trying to get them in front of the camera! Thanks.)


With your needlenose pliers, make sure the end is straight.


Hook your loop onto the ring at the base of your earring, and pinch close with the needlenose pliers.


Repeat with remaining supplies, and enjoy!